
During Microsoft Ignite in November 2021, Azure Sentinel is now called Microsoft Sentinel.
In this article, we will share with you how to monitor Microsoft Entra ID (formerly Azure AD) emergency accounts, also known as break glass accounts with Microsoft Sentinel.
Table of Contents
Introduction
Microsoft Sentinel is a cloud-native Security Information Event Management (SIEM) and Security Orchestration Automated Response (SOAR) solution. Microsoft Sentinel delivers intelligent security analytics and threat intelligence across the enterprise, providing a single solution for alert detection, threat visibility, proactive hunting, and threat response.
The cloud environment needs emergency accounts, also known as break glass accounts, to build a resilient environment. These accounts should only be used when a regular admin cannot sign in – break glass accounts must be guarded heavily.
In this article, we will walk you through how to create an analytic rule in Microsoft Sentinel that will trigger an alert when an emergency (break glass) account is used and automatically run a security playbook to inform the organization’s Security Operation Center (SOC) team.
Prerequisites
To follow this article, you need to have the following:
1) Azure subscription – If you don’t have an Azure subscription, you can create a free one here.
2) Log Analytics workspace – To create a new workspace, follow the instructions here Create a Log Analytics workspace.
3) Microsoft Sentinel – To enable Microsoft Sentinel at no additional cost on an Azure Monitor Log Analytics workspace for the first 31 days, follow the instructions here.
4) Connect data from Azure Active Directory (Azure AD) to Azure Sentinel. Please note that to export sign-in data, you need to have an Azure AD P1 or P2 license. If you don’t have a P1 or P2, you can sign in for a Free Trial here. As a side note, the Microsoft documentation says here that any Azure AD license (Free/O365/P1/P2) is sufficient to ingest sign-in logs into Azure Sentinel. This is not correct, you cannot ingest sign-in logs with Azure AD Free or Office 365, and you need to have P1 or P2.
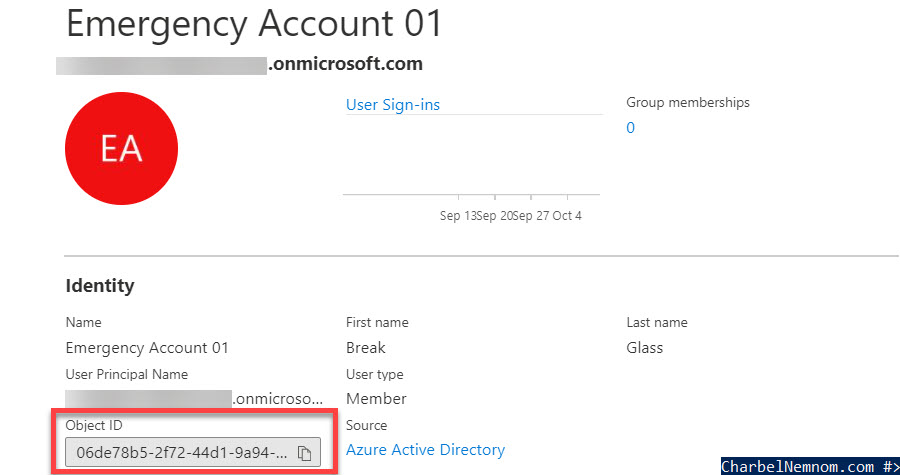
5) Emergency account created in Azure AD. Microsoft recommends having at least two emergency accounts. In this example, we have only one account. Please check the Microsoft documentation regarding setting up emergency accounts in your environment. Once the emergency account is created, you need to copy the Object ID as shown in the figure below. We need to use the Object ID in the next step.
Please note that if you just upgraded the Azure AD tenant license from Free to P1 or P2 premium license, you need to wait a couple of days until the Sign-in Logs table is created in the Log Analytics workspace. This latency has been confirmed by the Azure Active Directory team.
Create an analytic rule
Assuming you have all the prerequisites in place, take the following steps:
1) Open the Azure Portal and sign in with a user who has Microsoft Sentinel Contributor permissions.
2) Click All services found in the upper left-hand corner. In the list of resources, type Azure Sentinel. As you begin typing, the list filters based on your input.
3) Click on Azure Sentinel and then select the desired Workspace.
4) From Azure Sentinel’s sidebar, select Analytics under the Configuration section, then click + Create and select Schedule query rule as shown in the figure below. You could also create the new NRT query rule that is nearly real-time and runs every minute.

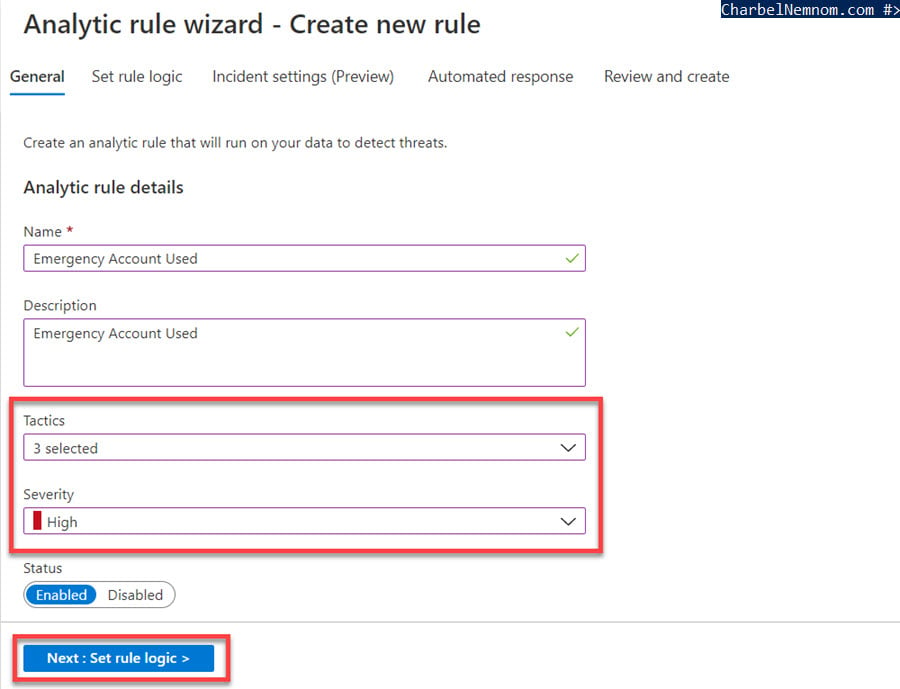
5) Give the analytic rule a meaningful ‘Name‘ and ‘Description‘, then select the following 3 ‘Tactics‘ (Initial Access, Privilege Escalation, and Credential Access). Those tactics are based on the MITRE ATT&CK Matrix for Enterprise. Then select ‘High‘ for the Severity and then click Next to Set rule logic.
6) In the Set rule logic page under the Rule query, type the following KQL syntax to query the sign-in logs against the specified emergency account.
Please make sure to replace the UserId with the Object ID of your account. In this example, we have defined the UserPrincipalName and IPAddress in the query for the account and IP entities.
SigninLogs
| project UserId, IPAddress, Location, SourceSystem, TimeGenerated, UserPrincipalName
| where UserId == 'object-id-of-the-account'
| extend AccountCustomEntity = UserPrincipalName
| extend IPCustomEntity = IPAddress
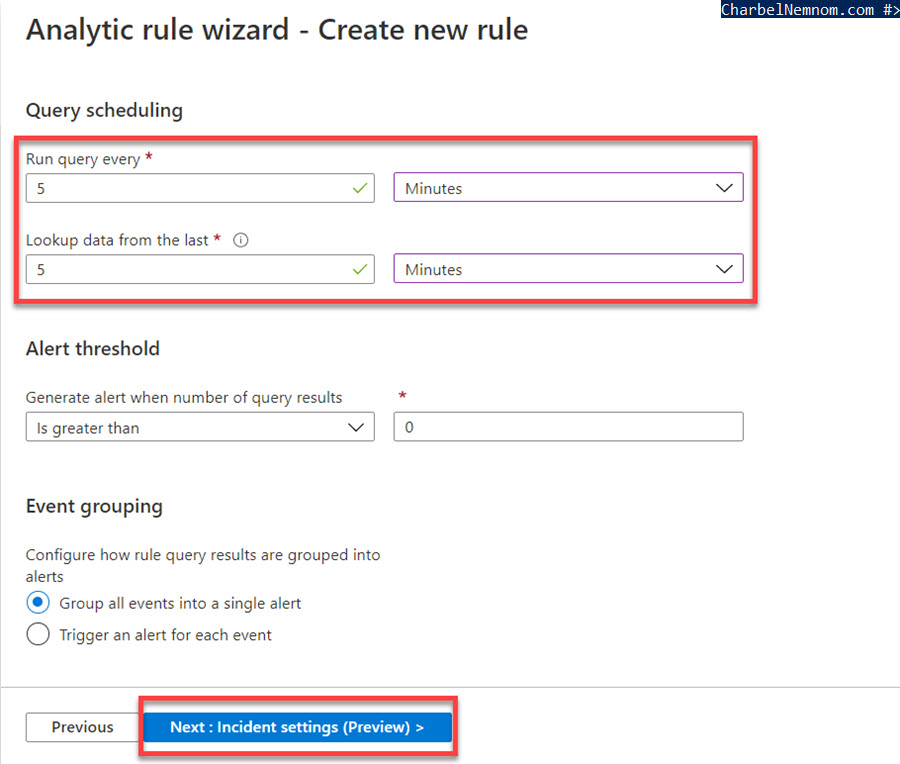
7) We will schedule this query to run every 5 minutes and look at data from the last 5 minutes. I will not change any other setting in this tab. Click Next to configure the Incident settings.
8) We will keep the default options for the Incident settings as well. Click Next to configure the Automated response.
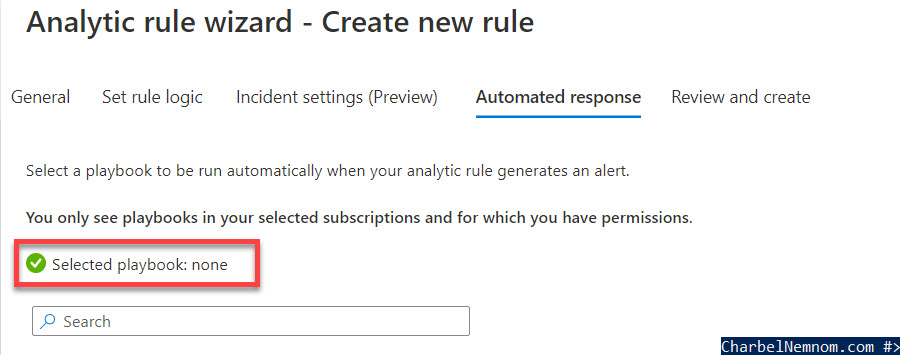
9) On the Automated Response page, I have nothing to select at the moment. In the next section, we will demonstrate how to create a security playbook and associate it with this analytic rule. Click Next to review and create.
10) In the Review and Create page, validate the settings and click Create to start the rule creation process.
Create a playbook
Now the analytic rule is created, let’s create a security playbook to respond in case of an alert.
1) Open the Azure Portal and sign in with a user who has Microsoft Sentinel Contributor permissions.
2) Click All services found in the upper left-hand corner. In the list of resources, type Microsoft Sentinel. As you begin typing, the list filters based on your input.
3) Click on Azure Sentinel and then select the desired Workspace.
4) From Microsoft Sentinel’s sidebar, select Automation under the Configuration section, then select + Create (Blank playbook). Remember that all playbooks are Logic Apps, but not all Logic Apps are playbooks. You must have a Microsoft Sentinel alert or incident trigger to promote a Logic App to the playbook.
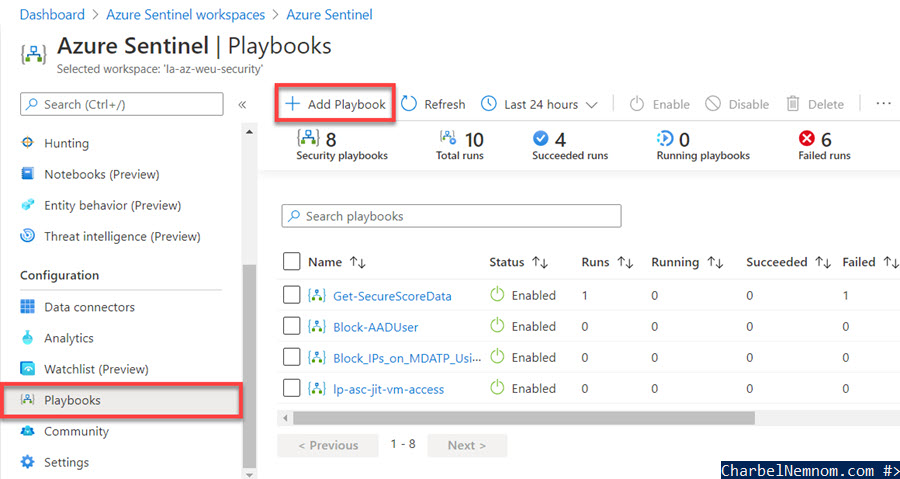
5) A new tab will open where you can enter the Basic information for the logic app. Select the desired subscription and the resource group that you have created for the Logic App and then enter an appropriate name for the playbook.
For the Plan type, choose Consumption plan (You pay only as much as your workflow runs.) Click Review + Create to validate and then click Create again.

6) Once the deployment is completed, click Go to the resource.
7) In the Logic Apps Designer view, click the Blank Logic App.
8) Next, search for the Microsoft Sentinel in the search connectors and triggers box, you will find this trigger easily.
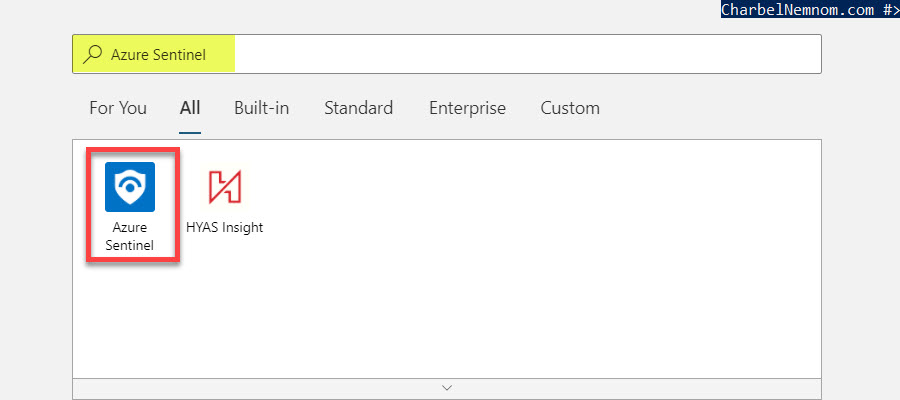
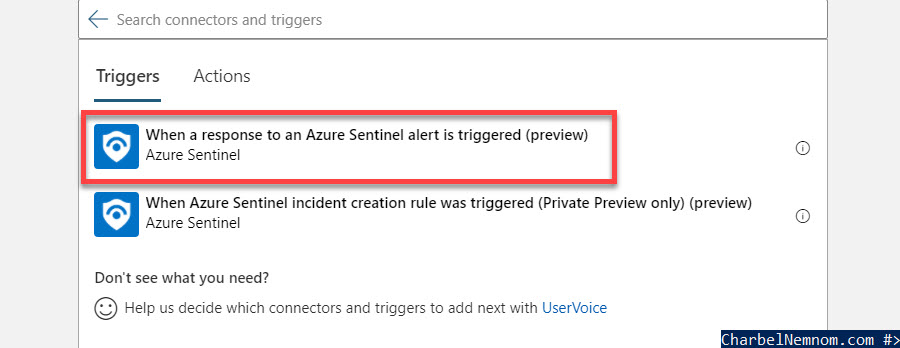
9) There are two different kinds of triggers available to us. For this example, we will choose, the new Microsoft Sentinel alert (preview).
10) This trigger requires a connection. Click Sign in and log in with the user with sufficient permissions needed for this connection to work. You can also use a service principle to create a connection.
11) In this example, we want to send a message to the Microsoft Teams channel whenever someone successfully logs in with the emergency account. These emergency accounts have administrative permissions and should only be used for testing or in real emergency scenarios. That’s why it is crucial to inform the SOC team members and roles like CISO or ISM about the usage of such accounts. The good news is, that Logic App has a built‑in connector for sending messages to the Microsoft Teams channel, Slack channel, email, etc.
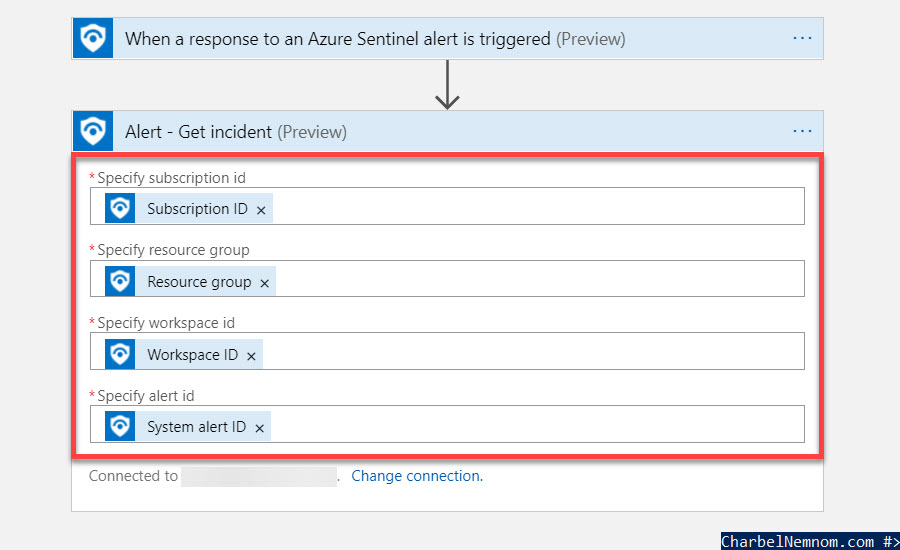
12) In the Logic Apps Designer, click + New step, search for Microsoft Sentinel, and then choose ‘Alert – Get incident (preview)‘ under Actions. Then click on each field and choose from the Dynamic content, the Subscription ID, Resource group, Workspace ID, and System alert ID as shown in the figure below.
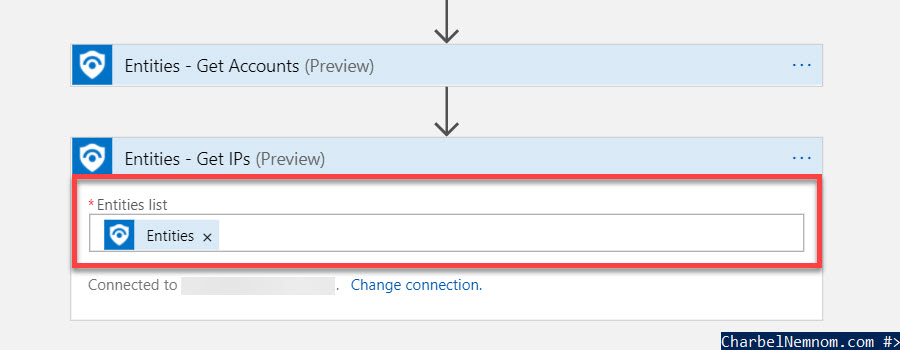
13) Click + New step again, search for Microsoft Sentinel, and then choose ‘Entities – Get Accounts (preview)‘ under Actions. Then click on the Entities list and choose from the Dynamic content, the ‘Entities‘ as shown in the figure below.

14) Click + New step again, search for Microsoft Sentinel, and then choose ‘Entities – Get IPs (preview)‘ under Actions. Then click on the Entities list and choose from the Dynamic content, the ‘Entities‘ as shown in the figure below.
15) Click the + New step one more time and search for Microsoft Teams. Choose Microsoft Teams under the Standard tab, and from the Actions list, you need to choose Post a message in a chat or channel. You can choose to post the message as “Flow bot” recommended, “User“, or “Power Virtual Agents“.
Microsoft Teams also needs a connection and requires signing in with a valid user with permissions. I have already created a Team channel using the same account I used to log into Microsoft 365 tenant. I will use the same user to initialize the connection.
16) Once the connection is established to Microsoft Teams. The next step is to choose which Team name and channel you would like to send the message to. We have already created a channel called ‘Azure Sentinel – Alerts‘ in my Team and we will choose it for this example.
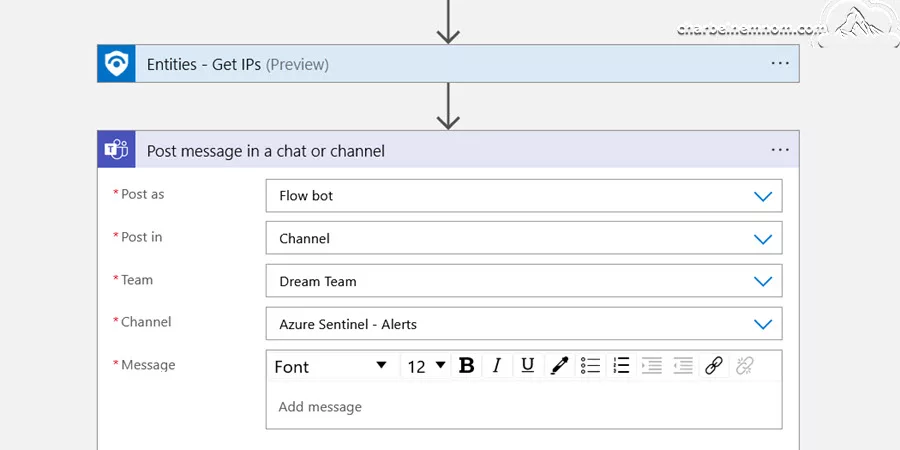
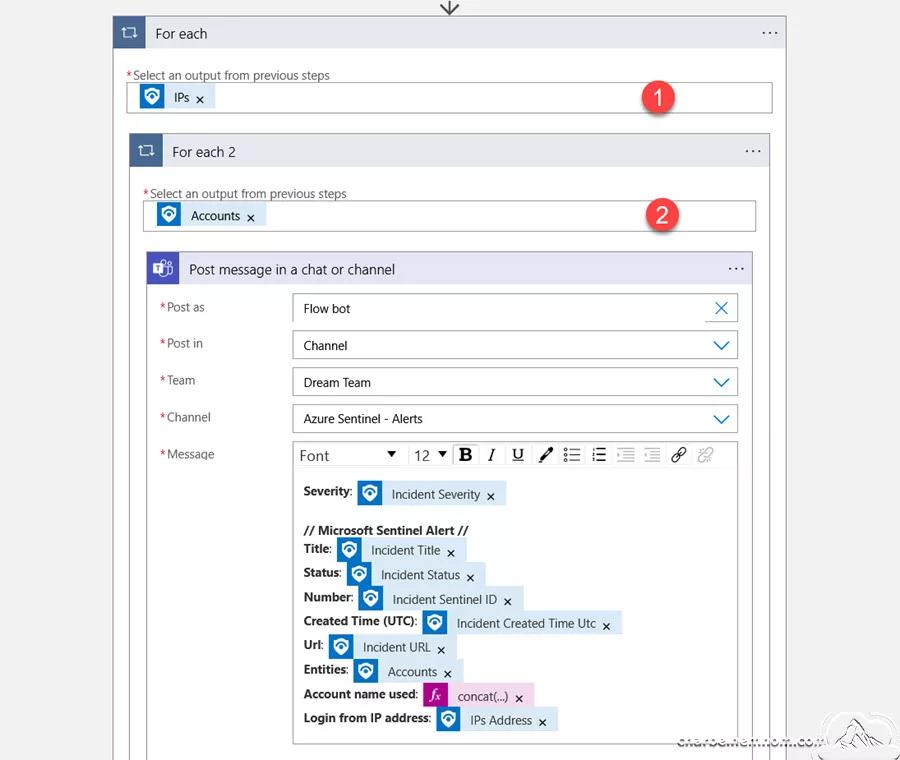
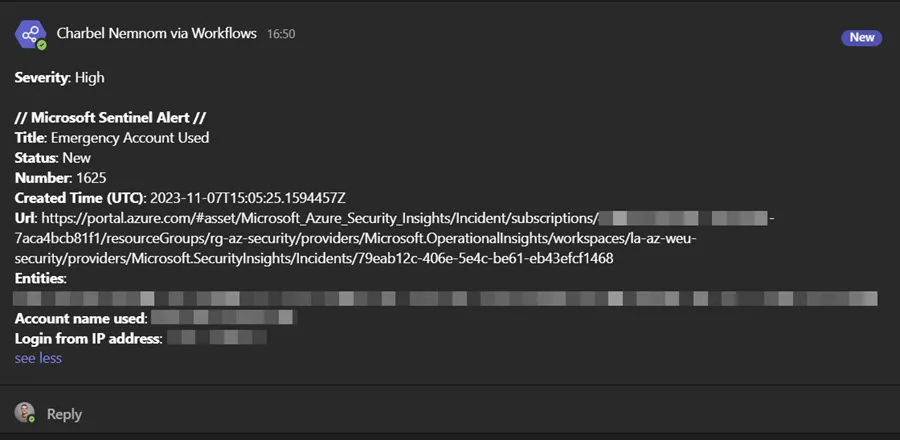
17) In the Message body, I will choose from the list of Dynamic content options for the message text, the Severity, Title, Status, Number, Created Time, URL, Entities, the Account name used, and the IP Address from where the emergency account was logged in.
Here is the concat expression that is being used for the “Account name used:” as part of the Teams message body:
concat(items('For_each_2')?['Name'], '@', items('For_each_2')?['UPNSuffix'])The entire message text looks like the following:
That’s it. On top of the page click Save. This will save the Logic App.
Quick Deployment of the Playbook
If you want to quickly create and deploy the playbook to post a message on Microsoft Teams, then you could deploy the playbook template by clicking on “Deploy to Azure“.

After the playbook is deployed, you need to update the steps as noted in the previous section and make sure to edit and authorize the API connections for the Logic App as shown in the figure below.

Modify the analytic rule
Now that the Logic App is created, you need to assign it to the analytic rule so you will get notified when an incident is triggered.
Now back to Azure Sentinel, take the following simple steps:
1) Select the desired Azure Sentinel Workspace.
2) From Azure Sentinel’s sidebar, select Analytics under the Configuration section.
3) From the list of Active rules, select the analytic rule that you created previously and click Edit.
4) Don’t modify anything. Click Next multiple times to reach the Automated Response tab where you can see the playbook you just created. Select the Logic App (playbook) and then click Next one more time.
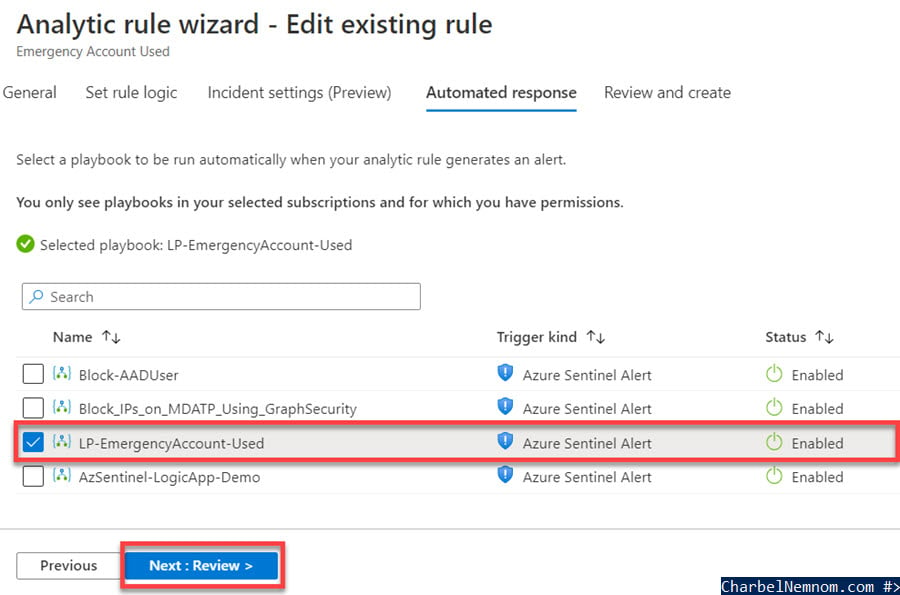
5) Verify quickly all the settings are correct and then click Save.
Now the analytic rule is ready with the automated response playbook.
Simulate an alert
To trigger an alert, you need to log into the Azure portal to simulate the emergency account usage.
I have logged into another virtual machine and I have installed the Tor browser that I will use to log in to the Azure portal to simulate the emergency account usage.
Launch the Tor browser, navigate to portal.azure.com, and use the emergency account to log in. Type the emergency account email and click Next. Then enter the password and click Sign in. If this is the first time you are accessing this emergency account, you will be asked to update your password, and on the next screen, click Yes if you would like to stay signed in for a while.
So now, that you have successfully logged into the Azure portal using the emergency account via the Tor browser, you can expect multiple incidents reported to the Azure Sentinel for this activity.
Let’s see if I have received any messages on the Microsoft Team channel. After waiting for a couple of minutes, a message popped up in my team channel as shown in the below screenshot, which means the analytic rule ran the playbook automatically, and the SOC team received this message. The message was posted via Workflows (Flow bot).
If you switch back to the Azure Sentinel and check if you have any incident created after this suspicious activity. You will see a new open incident that is created when using the emergency account. You can see the Incident ID number that was created by the analytic rule that I created in this example, which has the playbook attached to it.

You can also view more details of the incident by clicking on the View full details button.
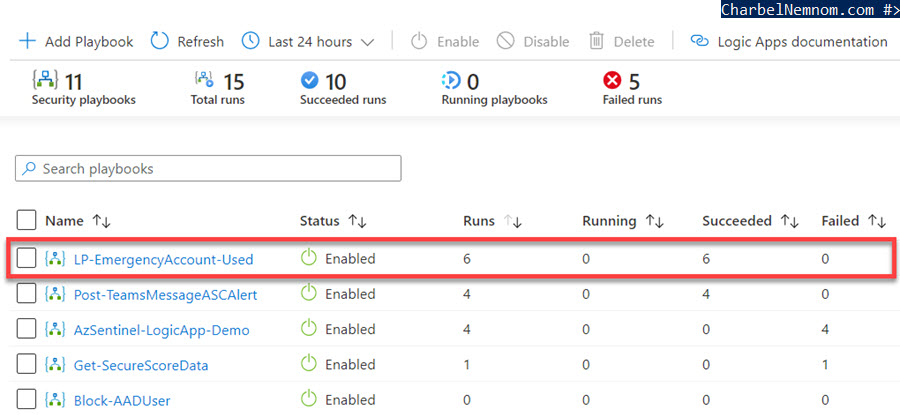
If you navigate to the Playbooks page and click Refresh, you will see the new playbook in the list and verify if it ran by the analytic rule. In this example, it runs successfully 6 times.
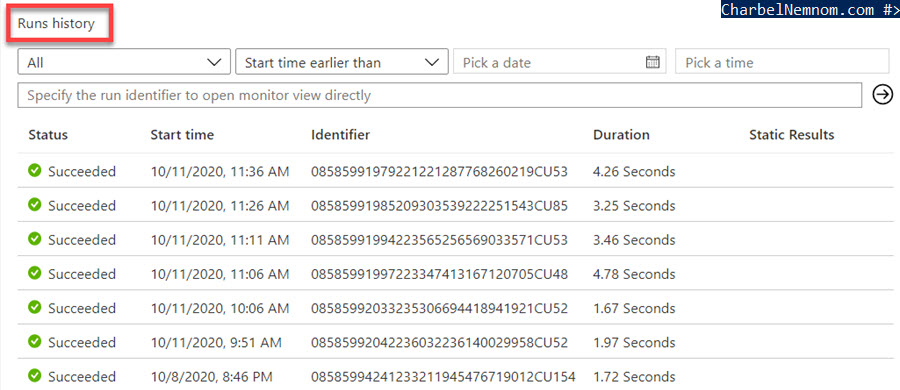
You can also click on the playbook name and see the Runs history on the overview Logic App page. You can see, I have successfully run entries in this list.
Summary
In this article, we showed you how to create an analytic rule in Azure Sentinel that will trigger an alert when an emergency account is used and automatically run a security playbook to inform the organization’s Security Operation Center (SOC) team.
Please note that this is only one automation scenario I showed you on how to respond to security threats by posting a message on Microsoft Teams, you could also automatically disable/block the account in Azure AD and send an email, etc. Additionally, creating your own playbook is not the only option that you have. There are plenty of playbooks available in the Azure Sentinels GitHub page contributed by the community and Microsoft security experts that you can leverage.
Additional resources I highly encourage you to check:
- Learn more about Azure Sentinel, check the official documentation from Microsoft.
- Learn about Analytics Rules, check the official documentation from Microsoft.
- Learn about Playbooks, check the Azure Sentinel’s GitHub page contributed by the community and Microsoft.
The power of Azure Sentinel comes from the ability to detect, investigate, and remediate threats. To do this, you must first ingest data in the form of alerts from different security providers, such as Azure Security Center or other Microsoft solutions, as well as other third-party solutions.
__
Thank you for reading my blog.
If you have any questions or feedback, please leave a comment.
-Charbel Nemnom-

This is awesome stuff. Thanks for putting it together! One question for you is related to Create a Playbook step #17. Do you recall what syntax you used for the concat function for the “Account Name Used” part of the message body?
Hello Rclayt, thanks for the comment and feedback!
Here is the concat expression which was used for the “Account Name Used” as part of the message body in step #17:
Hope this helps!
Hi, thanks for providing this guide. I do have two questions:
Do you intend to update this blog to reflect the current Sentinal development state? It does look a bit different nowadays.
Second, I do receive an error message in the Get-incident step
“message”: “The response is not in a JSON format.”,
“innerError”: “Invalid subscription id or resource group or API connection”
Any idea what I’m doing wrong?
Regards
Peter
Hello Peter, thanks for the feedback and comment!
Please note that the article has been updated to reflect the recent changes in Microsoft Sentinel.
You need to redeploy the Playbook as noted under the quick deployment section and adjust the steps as described.
Let me know if it works for you.
Hi!
Is it possible using Managed Identity for this? How could that look like? We have used User Account and Service Principal in similar alerts and experienced issues that they stop working cause of client secret expired/token expire.
Hello Markus, thanks for the comment and the great question!
Yes, you can use Managed Identity and identify when an Azure AD managed identity accesses a resource.
For this to work, you need to update the Data Connector for Azure Active Directory to include “
Managed Identity Sign-In Logs (Preview)”.Once you start ingesting Managed Identity Sign-In Logs, you can use the following KQL example in your Analytics Rules to summarize the Azure resources that each of your managed identities are accessing. The higher the count the higher the potential blast radius.
Hope it helps!
Hey! I’m trying to get this to work but it seems some things changed since this guide was published. I notice i now have to use Microsoft Sentinel Incident (preview) instead of Alert, or else i wont be able to choose the playbook in Automation rules. So i skipped the step “”Alert – get incident”.
When i add Entities – Get Accounts (preview) and/or Entities – Get IPs and add it to Post a message to Teams, it will skip sending message to Teams every time i run the Playbook. It adds an For each, IPs like in your guide. What could i be doing wrong so it skips the message every time?
Also, when we use user accounts for Teams connection, will not the token expire? Do we need to update the connection sometime in the future?
Hello Markus, thanks for the comment!
Please note that I just created a new blank playbook from scratch and I was able to use “Microsoft Sentinel alert (preview)” and the step “Alert – Get incident (preview)”.
When creating a new automation rule as a Trigger “When alert is created”, I am able to select the Playbook which was created as “Microsoft Sentinel alert (preview)”.
The guide is UpToDate and accurate. You might need to look at the Playbook permissions under Settings > Settings > Playbook permissions if you can’t select the playbook in Automation rules.
Running the Playbook manually from the Logic App won’t work and it will skip sending messages to Teams.
The Playbook must run from Sentinel > Automation rules since it requires “Microsoft Sentinel alert” as input.
As for Teams connection, the token won’t expire, please do not use a personal user account for Teams connection, if that account is disabled or the user left the company, the API connection will fail.
Sorry, I can’t provide further support here. If you are interested in working on this together, please feel free to reach out using this form.
Hope it helps!