
In this article, we will show you how to install Azure File Sync on Windows Server Core installation.
Table of Contents
Introduction
In July 2018, Microsoft announced the GA release for Azure File Sync. With Azure File Sync, you can centralize your files in Azure and then install a sync agent on Windows Server whether it’s on-premises or in Azure to provide fast local access to your files. Your server and Azure Files are constantly in sync, so you have one centralized location for your files with multi-site access powered by a fast local cache and cloud tiering.
If your server becomes unavailable for any reason, you just need to install the Azure File Sync agent on another server or virtual machine, and your users and applications can access the file again within minutes, this is a great solution for rapid file server DR scenario. With the integration of the Azure Backup service, you can also protect your data in the cloud without worrying about on-premises backup solutions. With Azure File Sync, you get the benefits of consolidating your files in the cloud, matched with the performance of a local file server.
For more information about Azure File Sync, check my previous step-by-step guide on how to get started with Azure File Sync and PowerShell. Additionally, Microsoft streamlined the deployment of Azure File Sync in Windows Admin Center to make that process easier. Check the following article to learn more about Windows Admin Center and Azure File Sync.
With the initial release of Azure File Sync, Microsoft supported the following Windows Server versions and installation options:
- Windows Server 2022 (Datacenter and Standard) – Server with Desktop Experience
- Windows Server 2019 (Datacenter and Standard) – Server with Desktop Experience
- Windows Server 2016 (Datacenter and Standard) – Server with Desktop Experience
- Windows Server 2012 R2 (Datacenter and Standard) – Server with Desktop Experience
Microsoft has pushed the IT Pros into Server Core strenuously, because Server Core’s smaller footprint comes with a smaller attack surface, making it less vulnerable than the Server with Desktop Experience option, yet promotes Azure file share and Azure file sync to help us use the Azure cloud with no Server Core support. The community did not appreciate this lack of support.

Microsoft confirmed that Server Core support is also coming to Azure File Sync. The reason why the delay is that you need to log in with a username/password to the AzureRM/AZ module, and this doesn’t do the right thing because Server Core lacks the ability to pop an Internet Explorer (IE) login. The user’s voice was very active in the previous months to add support for Server Core installations for Azure File Sync.
Finally, the wait is over, with the release of Azure File Sync Agent version 6 and later, Microsoft added support for Server Core installations!
Prerequisites
The prerequisites are very simple as follows:
1) You need to have Windows Server Core (Datacenter or Standard) either running Windows Server 2012 R2, 2016, 2019, or 2022.
2) You need to download and install PowerShell version 6 from here. At the time of this writing, Microsoft released PowerShell v6.2.0.
3) You need to install the latest Az PowerShell module from here.
4) You also need to install the latest Az.StorageSync module from here.
5) You need to download and install Azure File Sync agent v6.0 from here.
Deploy Azure File Sync on Windows Server Core
This section will describe how to automate Azure File Sync installation on Server Core.
First, you need to download and install PowerShell version 6, you can run the following set of commands:
#! Download PowerShell v6.2
Invoke-WebRequest `
      -Uri https://github.com/PowerShell/PowerShell/releases/download/v6.2.0/PowerShell-6.2.0-win-x64.msi `
      -OutFile "PowerShell6.msi"

#! Install PowerShell v6.2 in Silent mode
Start-Process -FilePath ".\PowerShell6.msi" -ArgumentList "/quiet ADD_EXPLORER_CONTEXT_MENU_OPENPOWERSHELL=1 ENABLE_PSREMOTING=1 REGISTER_MANIFEST=1" -Wait

#! Switch to PowerShell 6
Set-Location -Path "C:\Program Files\PowerShell\6\"
.\pwsh.exe
Next, you need to install the Az module as well as the Az.StorageSync module.
#Install PowerShell Az Module
Try {
    Import-Module -Name Az -ErrorAction Stop -Verbose:$false | Out-Null
    }
Catch {
    Install-Module -Name Az -Force -Confirm:$false
}

#Install PowerShell Az.StorageSync Module
Try {
    Import-Module -Name Az.StorageSync -ErrorAction Stop -Verbose:$false | Out-Null
    }
Catch {
    Install-Module -Name Az.StorageSync -Force -Confirm:$false
}
The next step is to download and install the Azure File Sync agent. On Windows Server Core, run the following command. This will download the appropriate Azure File Sync agent based on your Operating System version.
# Gather the OS version
$osver = [System.Environment]::OSVersion.Version
# Download the appropriate version of the Azure File Sync agent for your OS.
# Azure File Sync Version 15.0
# Windows Server 2022
if ($osver.Equals([System.Version]::new(10, 0, 20348, 0))) {
Invoke-WebRequest `
-Uri https://download.microsoft.com/download/1/8/D/18DC8184-E7E2-45EF-823F-F8A36B9FF240/StorageSyncAgent_WS2022.msi `
-OutFile "StorageSyncAgent.msi"
}
# Windows Server 2019
elseif ($osver.Equals([System.Version]::new(10, 0, 17763, 0))) {
Invoke-WebRequest `
-Uri https://download.microsoft.com/download/1/8/D/18DC8184-E7E2-45EF-823F-F8A36B9FF240/StorageSyncAgent_WS2019.msi `
-OutFile "StorageSyncAgent.msi"
}
# Windows Server 2016
elseif ($osver.Equals([System.Version]::new(10, 0, 14393, 0))) {
Invoke-WebRequest `
-Uri https://download.microsoft.com/download/1/8/D/18DC8184-E7E2-45EF-823F-F8A36B9FF240/StorageSyncAgent_WS2016.msi `
-OutFile "StorageSyncAgent.msi"
}
# Windows Server 2012 R2
elseif ($osver.Equals([System.Version]::new(6, 3, 9600, 0))) {
Invoke-WebRequest `
-Uri https://download.microsoft.com/download/1/8/D/18DC8184-E7E2-45EF-823F-F8A36B9FF240/StorageSyncAgent_WS2012R2.msi `
-OutFile "StorageSyncAgent.msi"
}
else {
throw [System.PlatformNotSupportedException]::new("Azure File Sync is only supported on Windows Server 2012 R2, Windows Server 2016, Windows Server 2019, and Windows Server 2022")
}
# Install the MSI package in silent mode
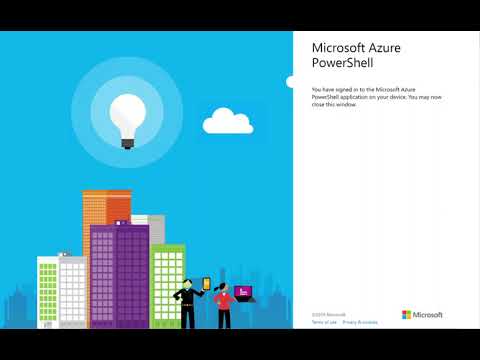
Start-Process -FilePath ".\StorageSyncAgent.msi" -ArgumentList "/quiet" -WaitNext, you need to connect and authenticate to Azure by using the Connect-AzAccount cmdlet. When you run this cmdlet, it will present a token string. To sign in, copy the code and paste it into https://microsoft.com/devicelogin in a browser on a different machine. Your PowerShell session will be authenticated to connect to Azure.
Finally, you need to register your file server to the Azure Storage Sync Service by running the following command. You need to specify the Resource Group Name as well as the Storage Sync Service Name.
Register-AzStorageSyncServer -ResourceGroupName 'String' -StorageSyncServiceName 'String'Here is a quick video showing you how to deploy Azure File Sync on Windows Server Core in action.
And there you have it.
Summary
Azure File Sync extends on-premises file servers into Azure providing cloud benefits while maintaining performance and compatibility.
Azure File Sync provides:
- Multi-site access – provide write access to the same data across Windows servers and Azure Files.
- Cloud tiering – store only recently accessed data on local servers.
- Integrates with Azure backup – no need to back up your data on-premises.
- Fast disaster recovery – restore file metadata immediately and recall data as needed.
With Windows Server Core support and Windows Admin Center, there is no excuse for not using Azure File Sync.
I hope you find this article useful.
__
Thank you for reading my blog.
If you have any questions or feedback, please leave a comment.
-Charbel Nemnom-